Configuring access points and a description of all settings
An Access point is a specific door with an electric lock, a gate, or a barrier with an electric drive, which can be controlled using the Propuskator ACS.
Adding an access point
- When the controller is connected, a message will appear in “Notifications” that an access point has been detected.
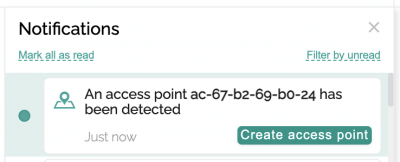
- Click the "Create access point" button.
- The “Create access point” window will appear with pre-filled fields.
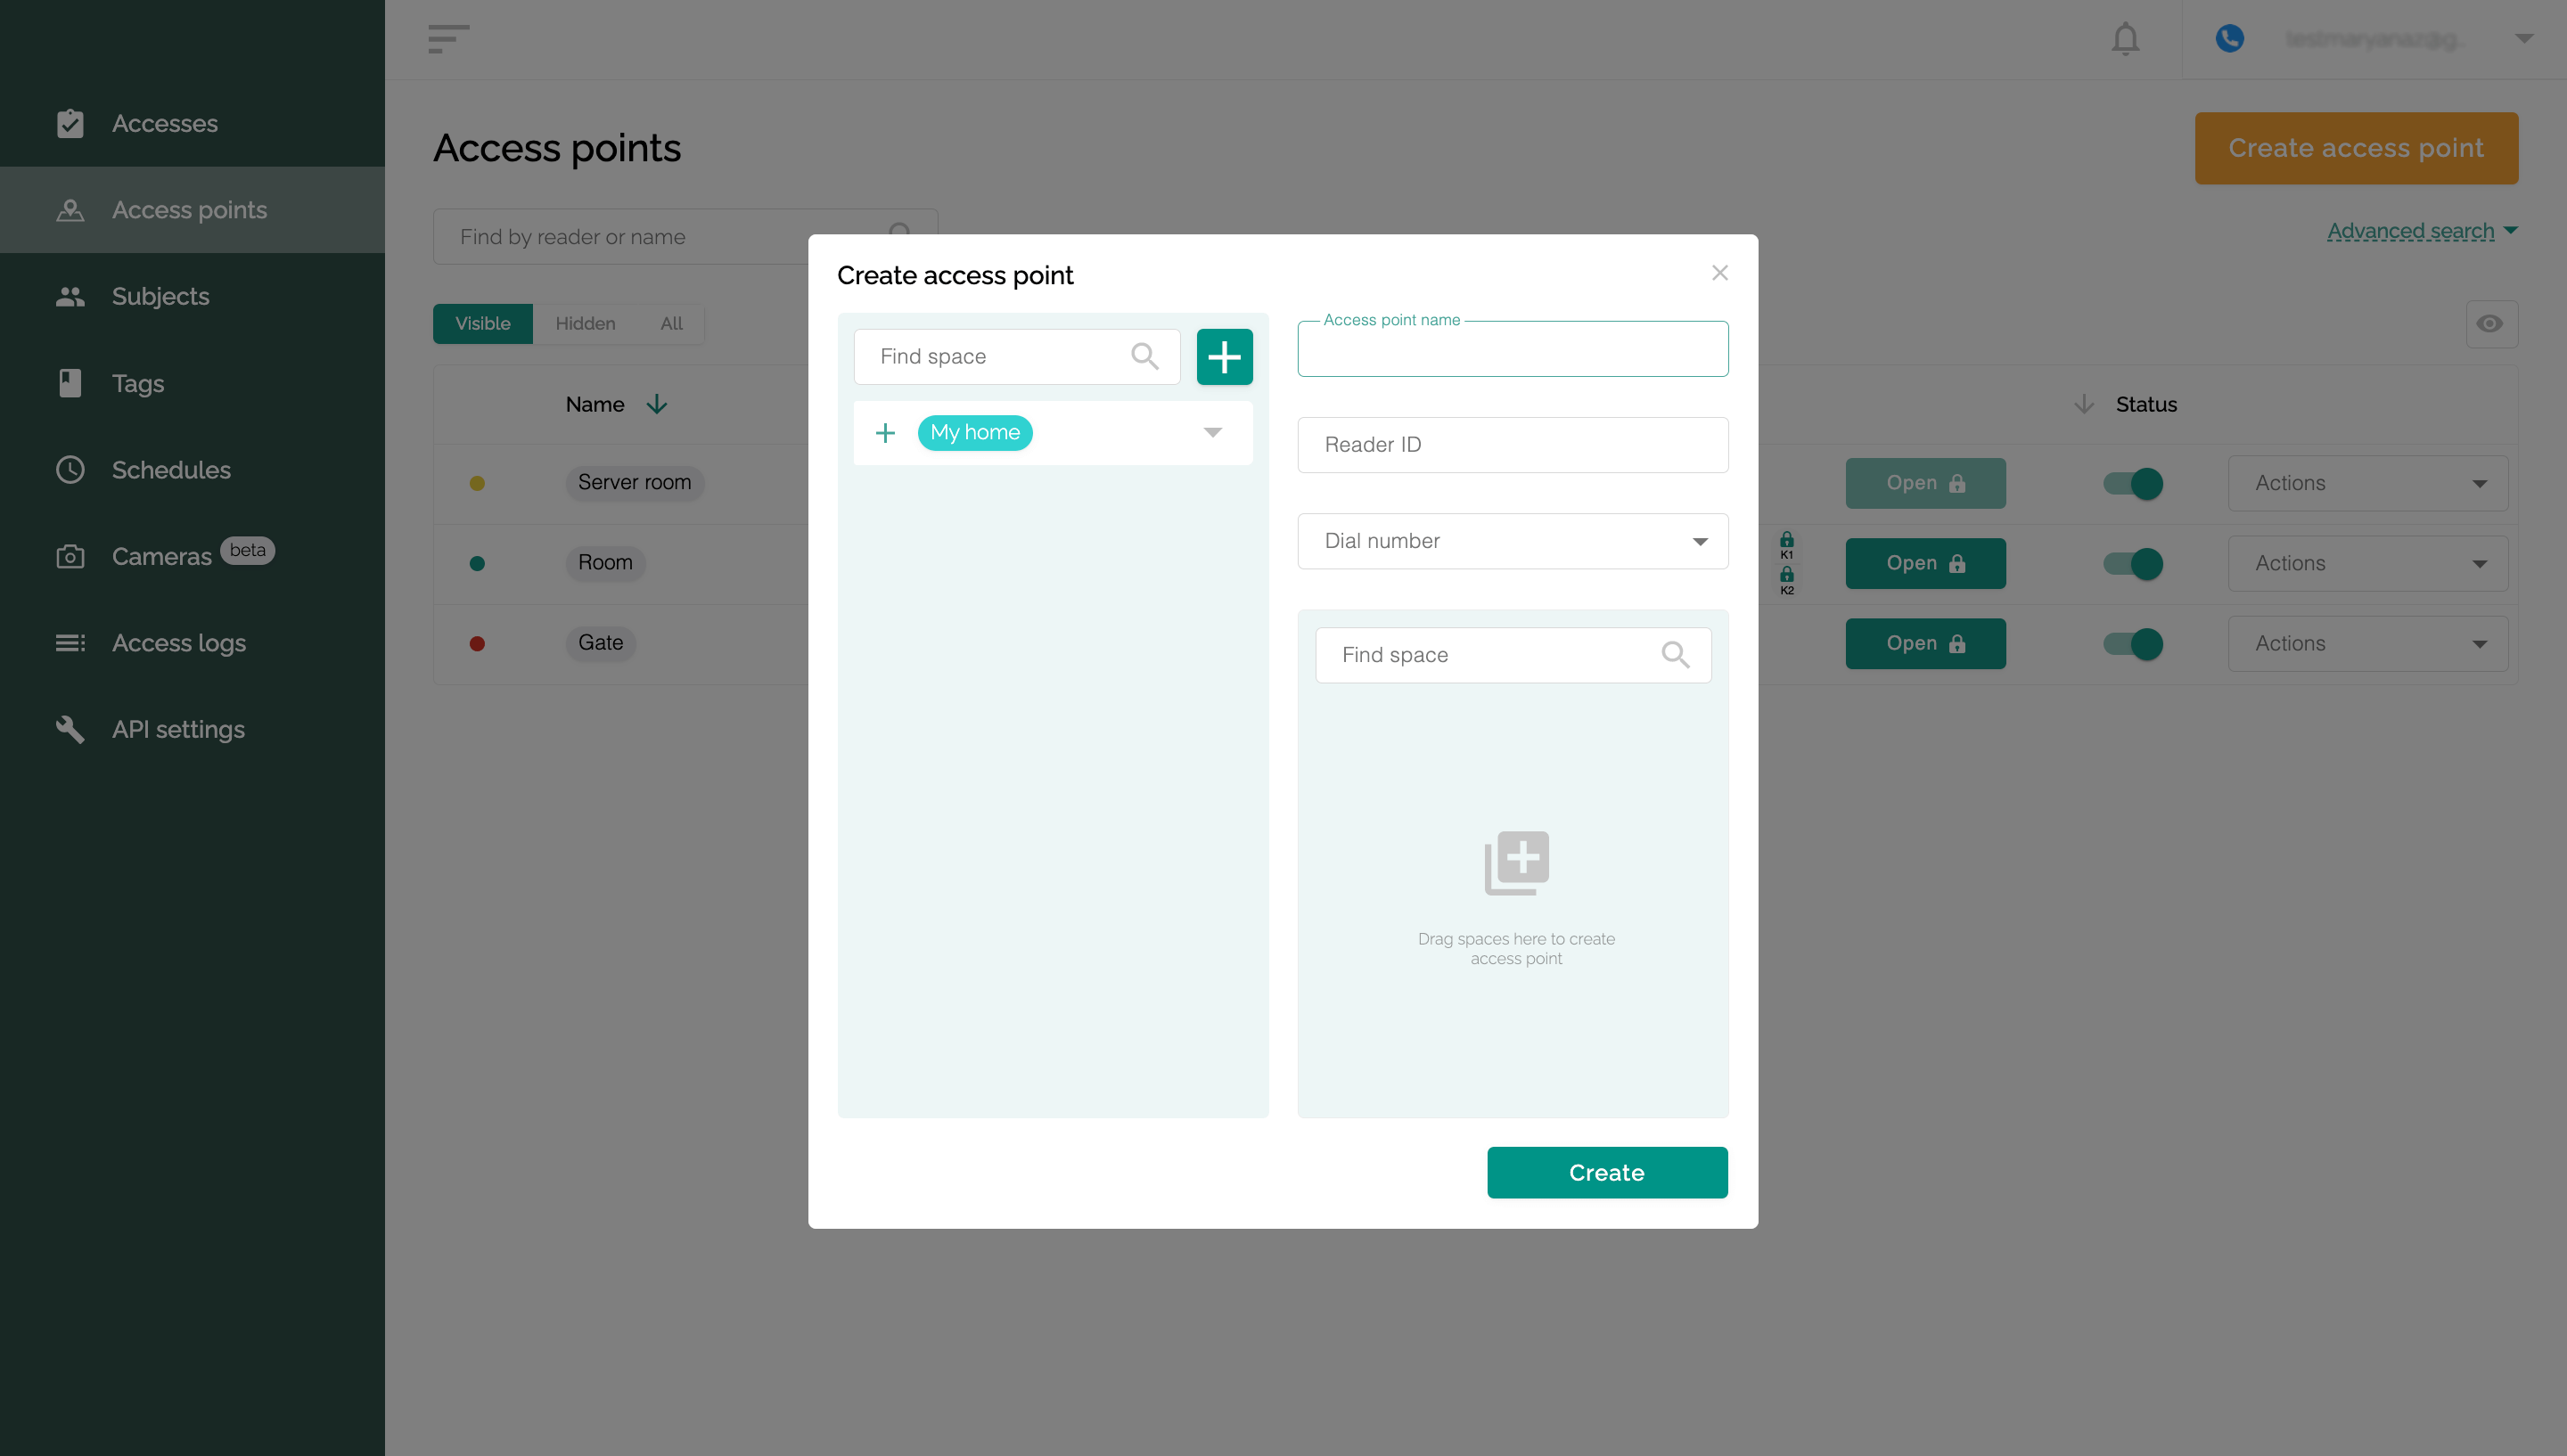
- Rename the “Access point name” field, by default it contains the reader ID.
- If necessary, add a “Dial Number” to be able to open or close a door, barrier, gate, etc. using a free phone call.
- Add an access point to an existing space (or multiple spaces) if necessary. To do this, select the required spaces in the list on the left by dragging them into a special field or by clicking on the “+” next to the space name.
- If you need to create a new space, click the “+” next to the “Find space” field and the corresponding window will open.
Access point settings
- Click on the “Actions” dropdown.
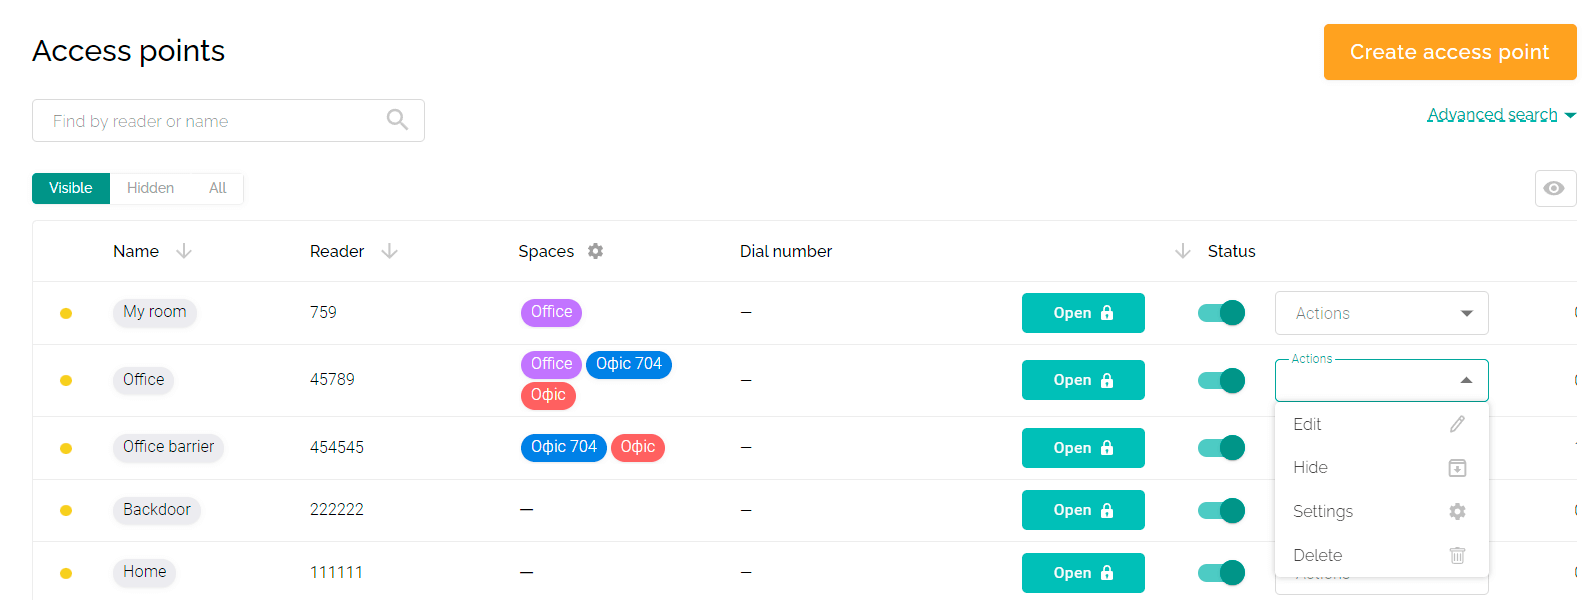
- Select "Settings".
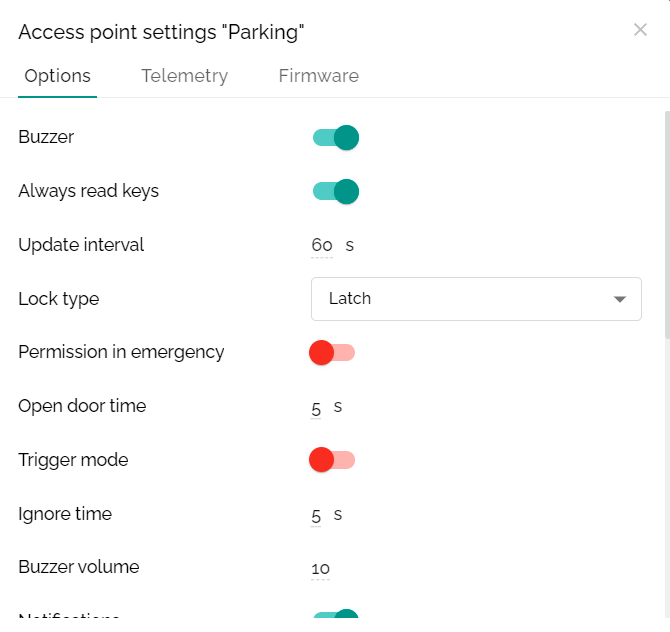
- Buzzer - beep when opened.
- Always read keys - a function for the barrier, in which while the access card on the car remains in the reader's coverage area, the barrier is open.
- Update interval - Time to automatically check for updates on the controller.
- Lock type - Magnet is electromagnetic, Latch is electromechanical.
- Permission in emergency - access for all users when an alarm is triggered.
- Open door time - the time period during which the door is open.
- Trigger mode - opening and closing the door by reading the tag.
- Buzzer volume - the volume of the sound signal.
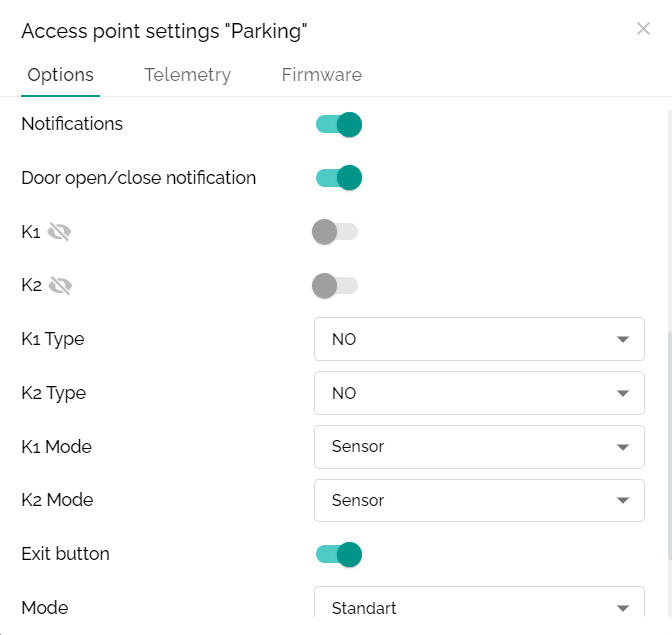
- Notifications - event notifications for this access point.
- Door open/close notification - notifications about the opening and closing of doors (the setting is not relevant for the Propuskator ACS).
- K1 - sensor state.
- K2 - second sensor state.
- K1 Type - reed switch type (NO - normally open, NC - normally closed).
- K2 Type - reed switch type (NO - normally open, NC - normally closed).
- K1 Mode - a type of connected device (Sensor, Alarm).
- K2 Mode - a type of connected device (Sensor, Alarm).
- Exit button - exit button support.

- Sound indication - a sound indication of controller network status.
- Reboot - rebooting the access point.
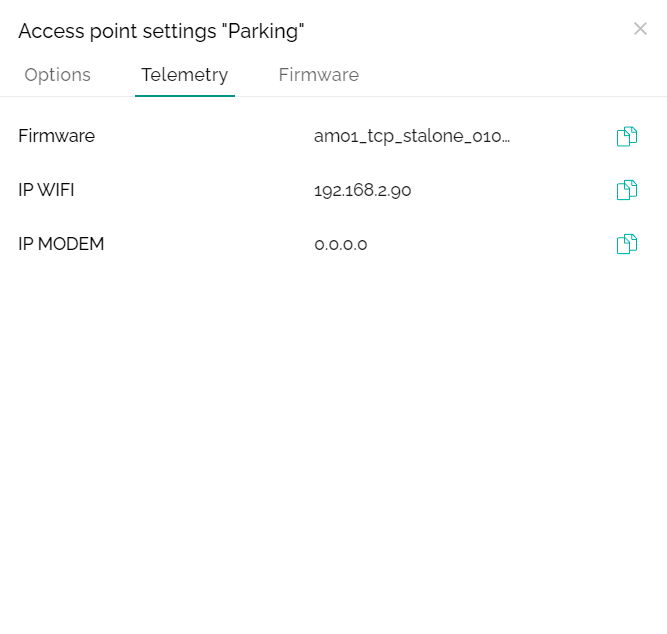
- Firmware - firmware name.
- IP WIFI - controller IP.
- IP MODEM - mobile operator IP.
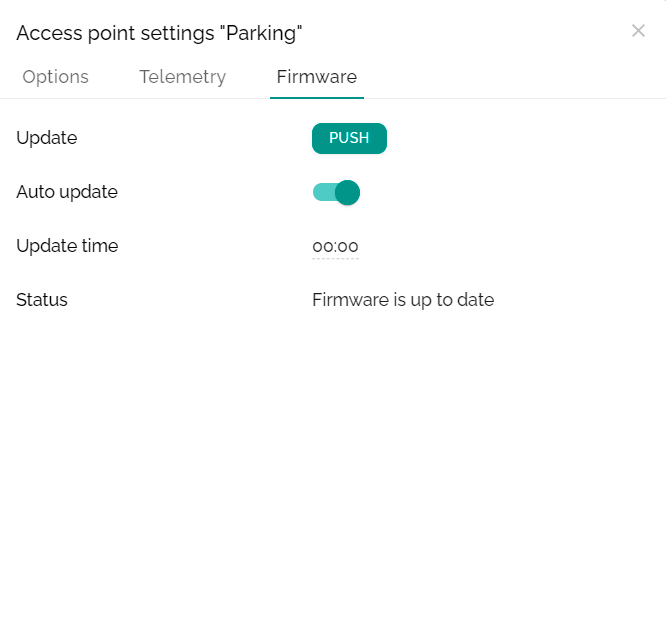
- Update - firmware update.
- Auto update - automatic firmware update.
- Update time - update time in UTC.
- Status - update status.
Additional actions (editing, archiving, and removing)
- Editing - renaming, editing the list of spaces and dial numbers for the access point. To do this, on the “Access points” tab, click on the “Actions” drop-down list and select the “Edit” item. After making changes, click the "Update" button.
- Hide (archive) - after selecting the “Hide” item in the drop-down menu, your access point will be turned off and moved to the “Hidden” tab. It can be returned to “Visible” at any time, for this, you need to turn it on by clicking on the red switch in the “Status” column.
- Delete - when you select "Delete" in the drop-down list, the access point is removed from the list. However, if it remains physically connected to the network, you will receive a notification prompting you to recreate the access point.