Setting up schedules
Use schedules to restrict access to specific users based on the time of day and day of the week.
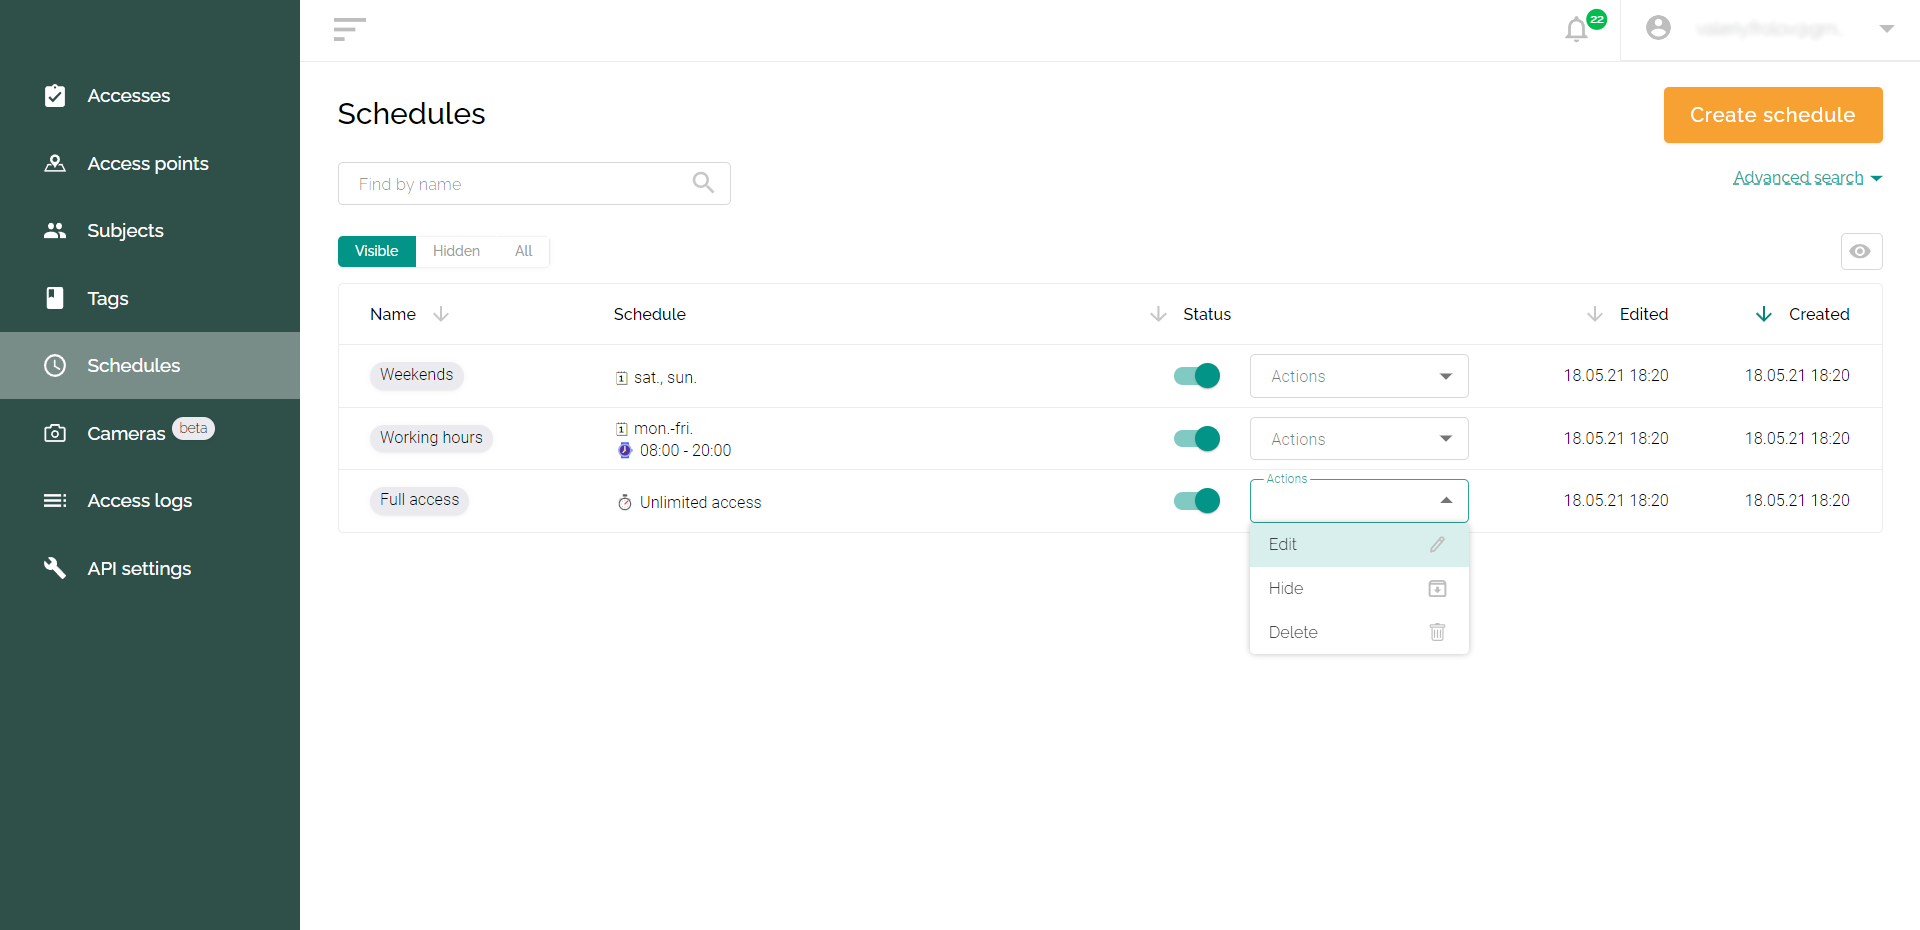
Three schedules are already created on the Schedules tab by default:
- Full access - no time limits.
- Working hours - Monday to Friday, from 8:00 a.m. to 8:00 p.m.
- Weekends - Saturday and Sunday with no time limit.
To edit existing schedules (for example, to specify the working hours on weekdays), select “Actions” - “Edit”.
Creating a new schedule
- Go to the "Schedules" tab.
- Click the "Create schedule" button.
- Enter a schedule name.
- If necessary, fill in the time interval (if you want to provide temporary access for several days, weeks, or months).
- Select the start and end times for the daily access (for access without time of day restrictions, do not change anything).
- Select the days of the week on which scheduled access will be available.
- Click the "Create" button.
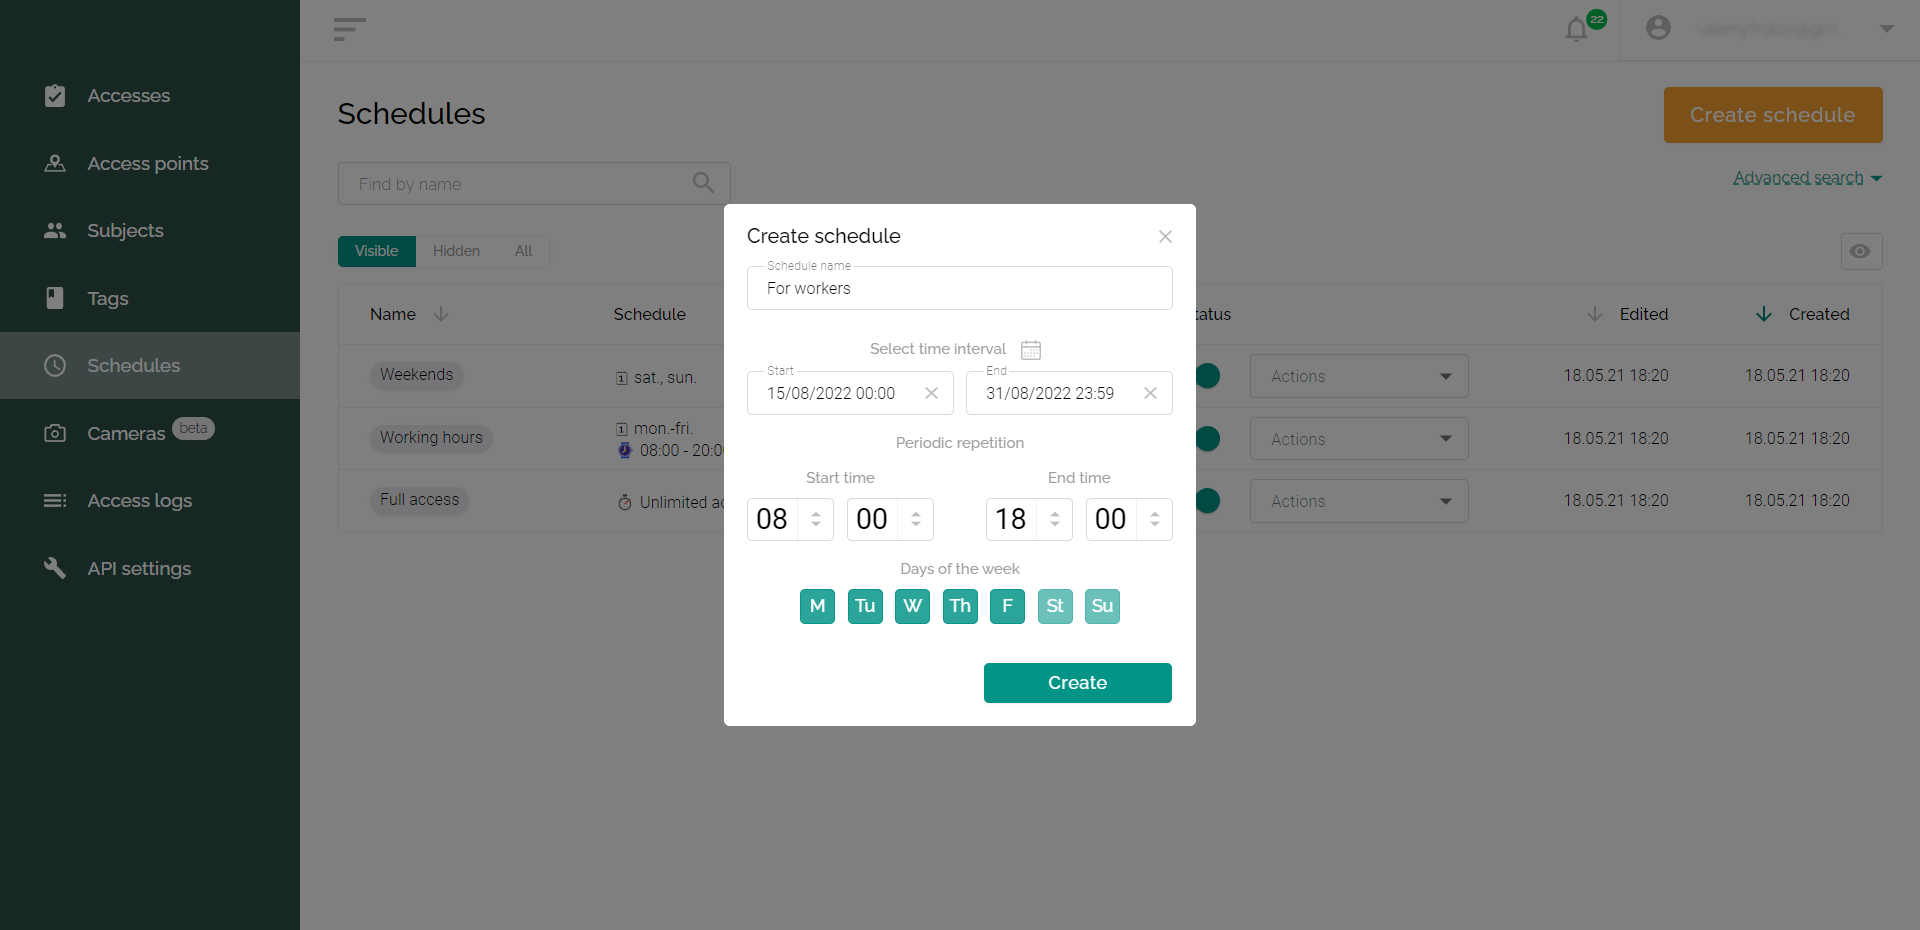
Please note! For the access schedules to work correctly, you must set your time zone in your account settings.
Additional actions (editing, archiving, and removing)

- Editing - changing the schedule name, time interval, access time and days of the week. To do this, on the “Schedules” tab, click on the “Actions” drop-down list and select the “Edit” item. After making changes, click the "Update" button.
- Hide (archive) - after selecting the “Hide” item in the drop-down menu, your schedule will be turned off and moved to the “Hidden” tab. It can be returned to “Visible” at any time; for this, you need to turn it on by clicking on the red switch in the “Status” column.
- Delete - when you select "Delete" in the drop-down list, the schedule is removed from the list and the system, and all accesses on this schedule become unavailable.