Creating tags
A tag is a virtual key for managing an access point. It can be an RFID card, bracelet, pipette, NFC tag, etc. To use tags, you need special devices - readers.
There are two methods to add a new tag
Method one:
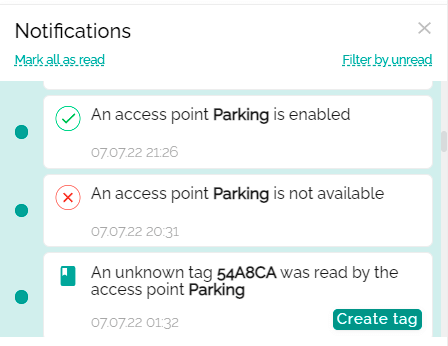
- Scan the new tag with the reader connected to the controller. A notification will appear in the web interface with the “Create tag” button. Click on it.
- In the window that appears, enter the name of the new tag, do not change its code.
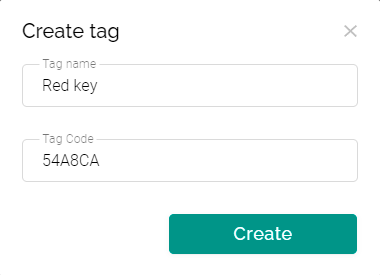
- Click "Create".
Method two:
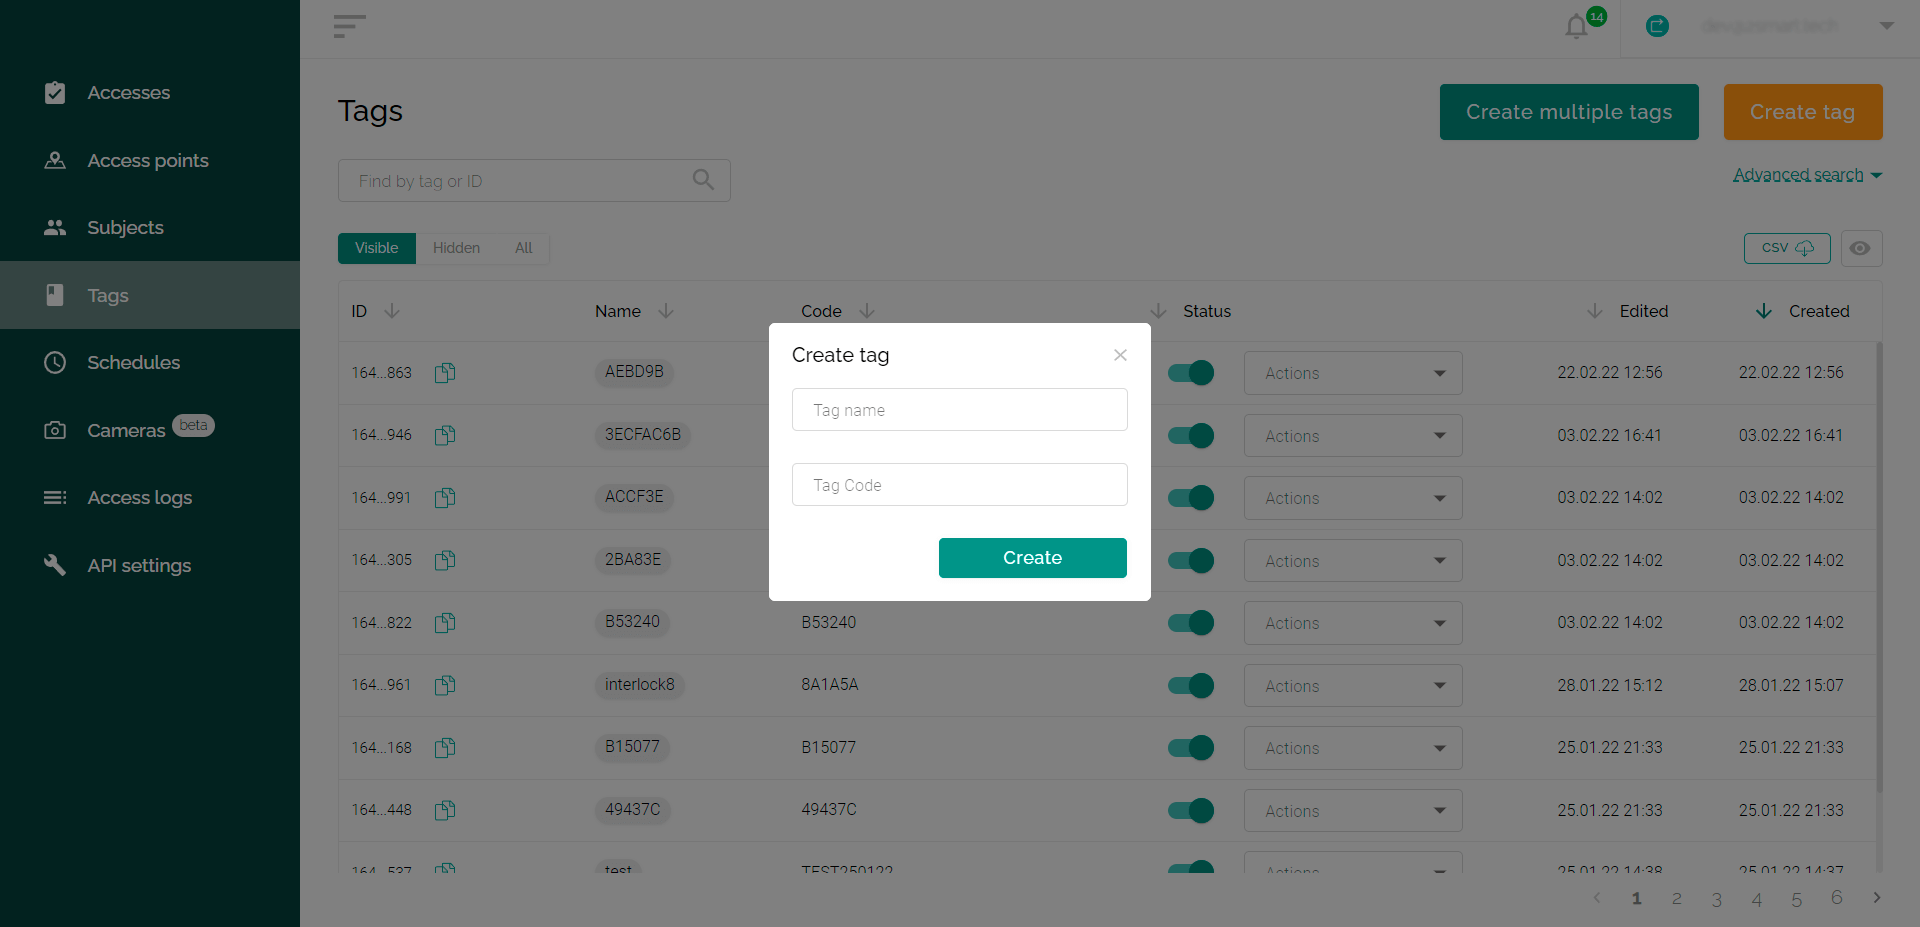
- Go to the Tags tab.
- Click the "Create tag" button.
- Enter the tag name and code (you need to know the code).
- Click "Create".
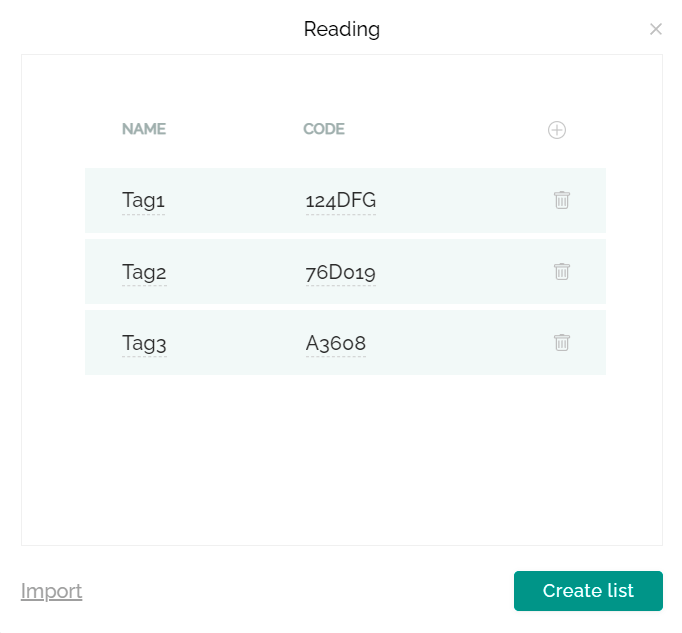
Adding two or more tags
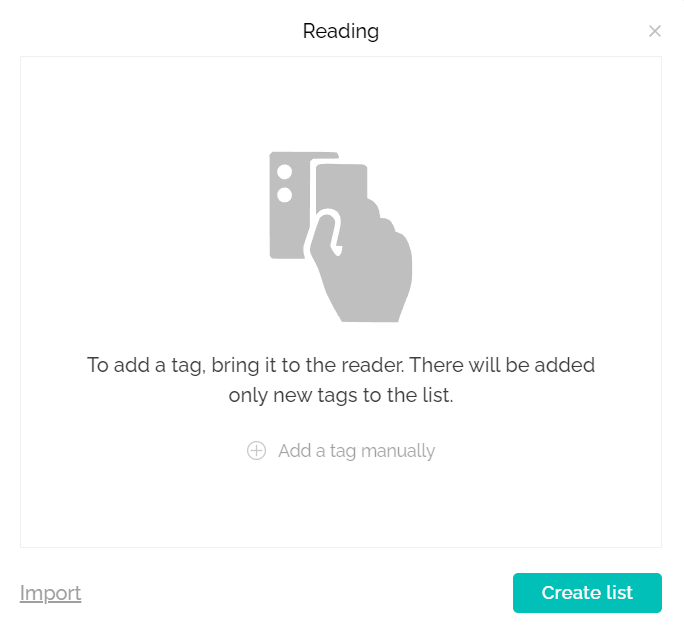
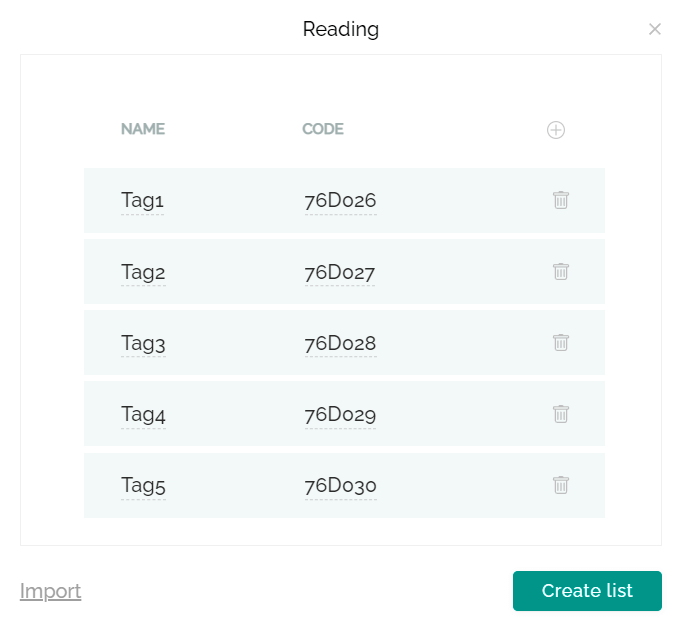
- Go to the Tags tab.
- Click the "Create multiple tags" button.
- Bring the tags to the reader one by one.
- Click "Create list".
Additional actions:
- You can remove a tag from this list by clicking on the trash icon.
- You can rename a tag by clicking on its name.
- You can edit the tag code by clicking on it.
Adding multiple tags using a file:
- Go to the Tags tab.
- Click the "Create multiple tags" button.
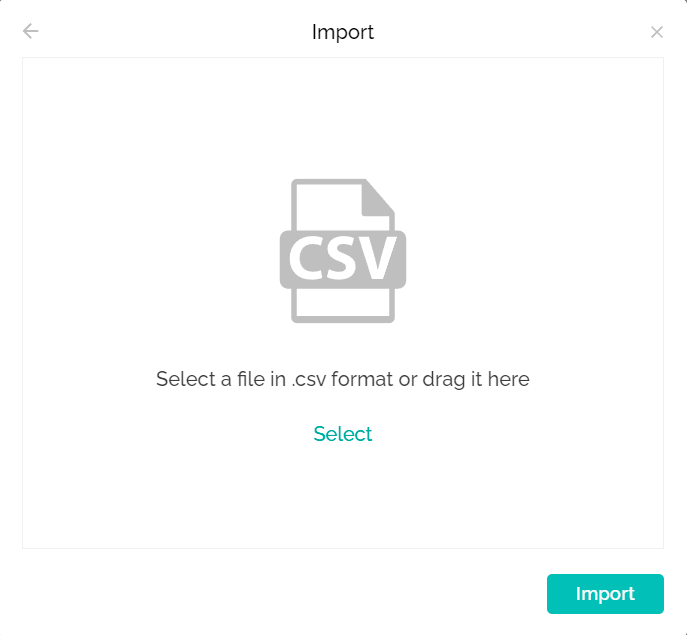
- Select a .csv file and upload it.
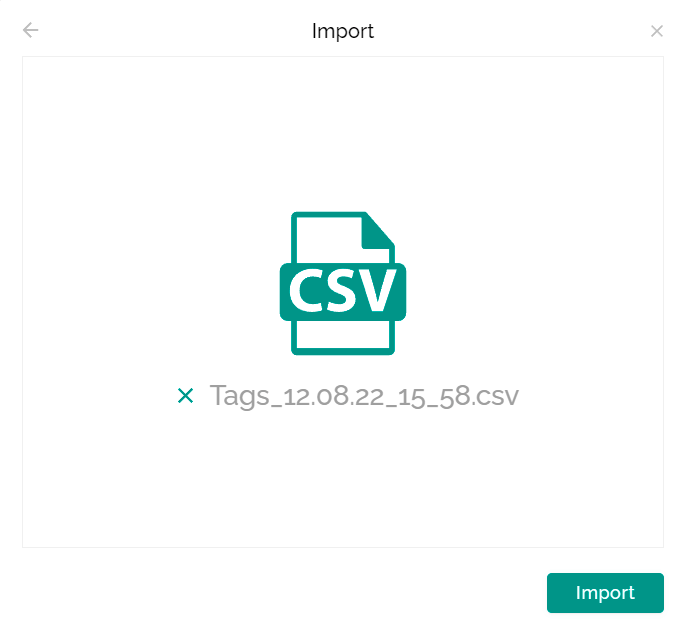
- Click "Import".
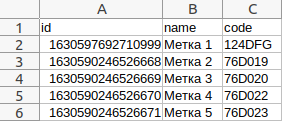
An example of how the table should be filled:
- ID – tag identifier.
- Name - tag title (optional).
- Code - tag code.
- Click "Import".
- Click "Create list".
Export list of tags
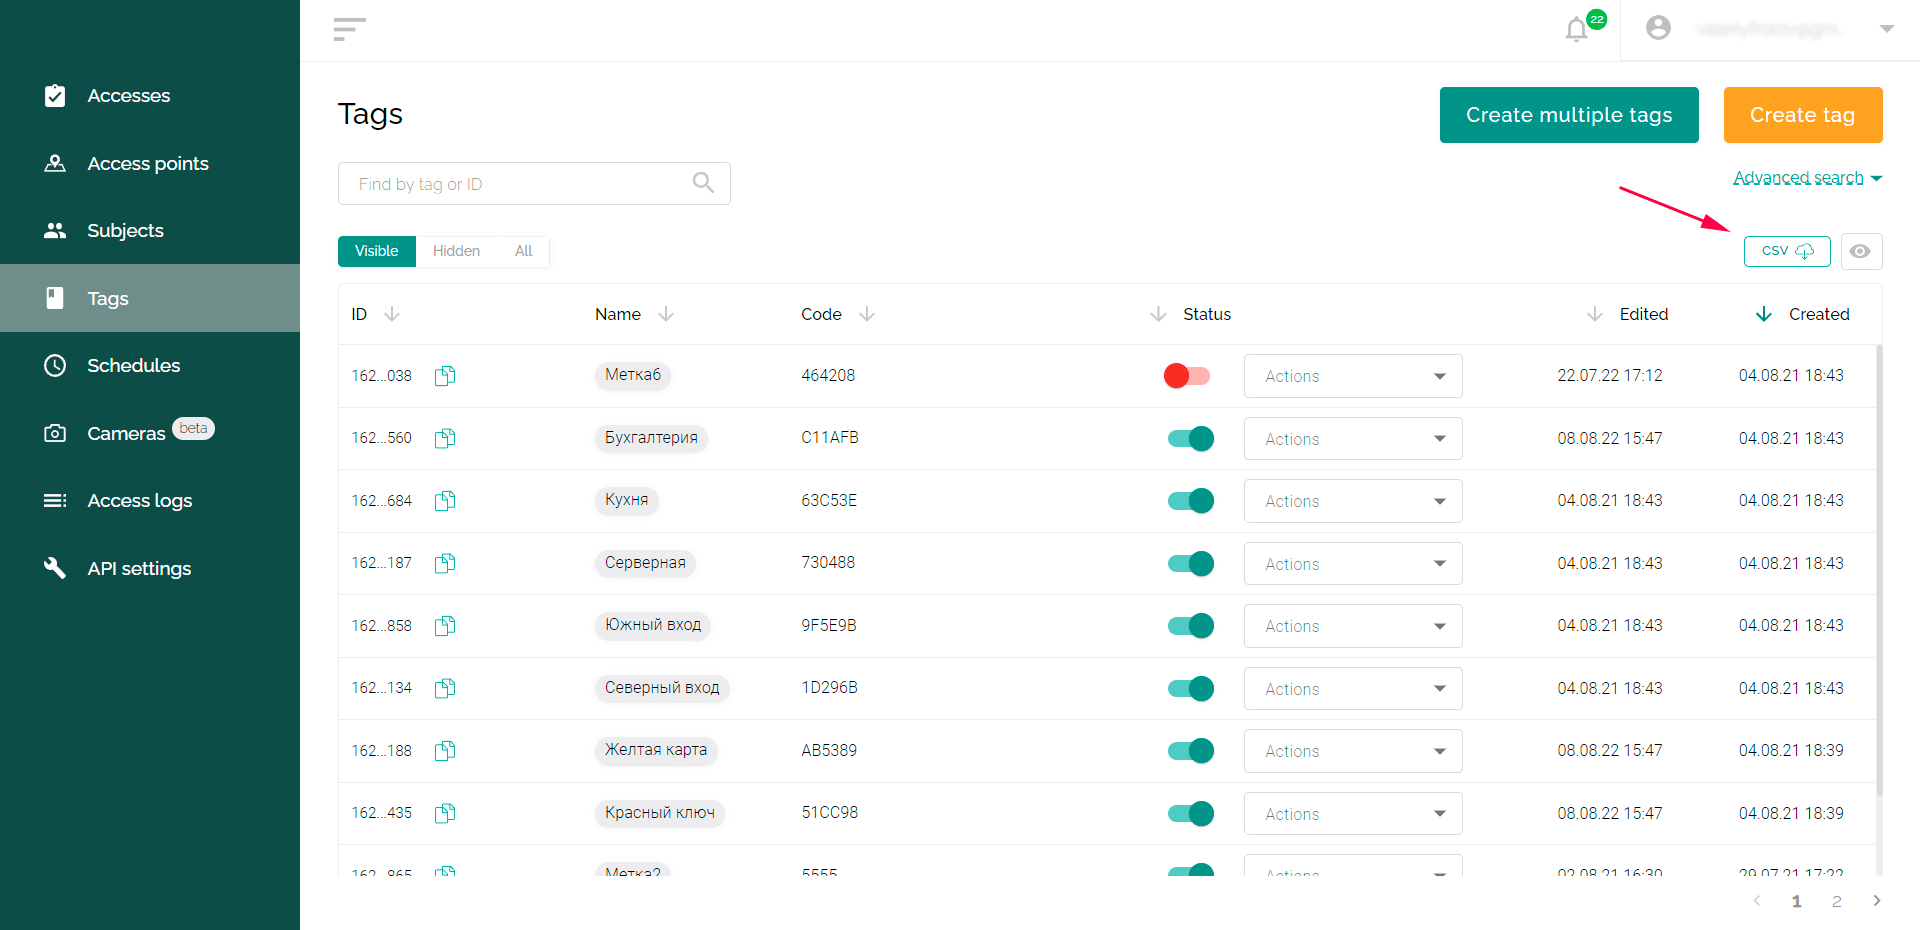
- To export the list of tags, click on the CSV icon.
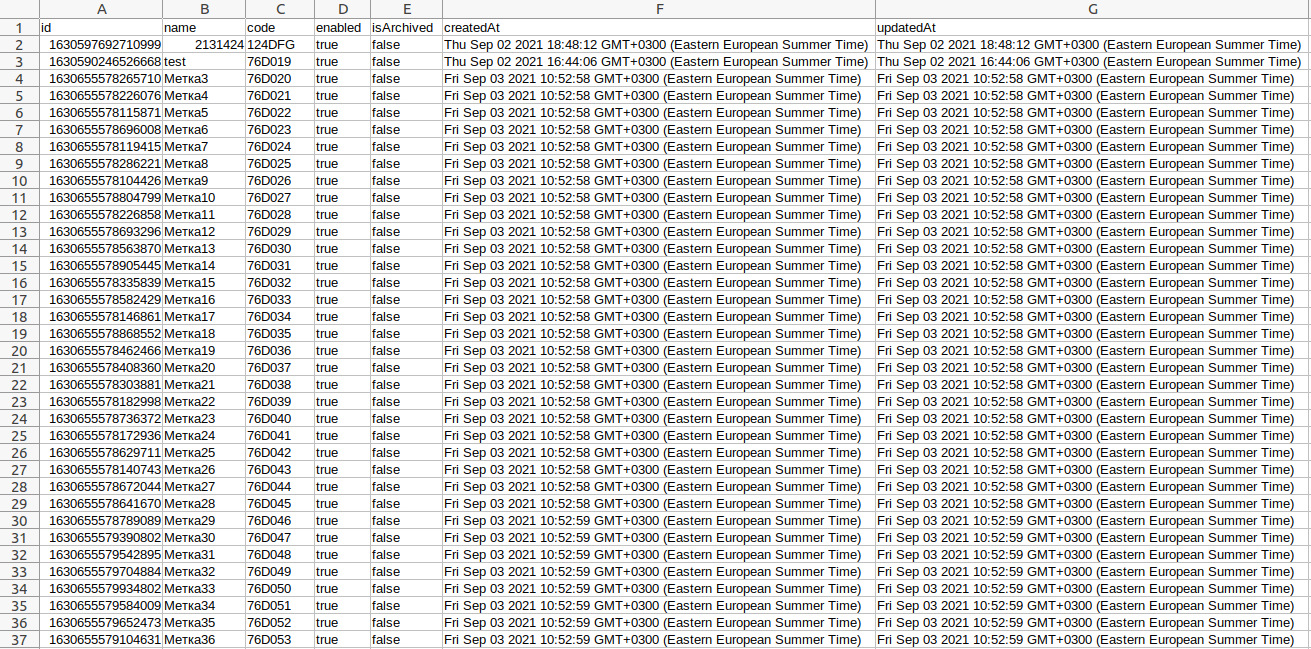
An example of the file with tags export:
- Id - tag identifier.
- Name - tag title (optional).
- Code - tag code.
- Enable - whether this tag is currently enabled.
- isArchived - whether the tag is hidden.
- createdAt - tag registration date.
- updatedAt - date and time when the tag was last edited.
Additional actions (editing, archiving, and removing)
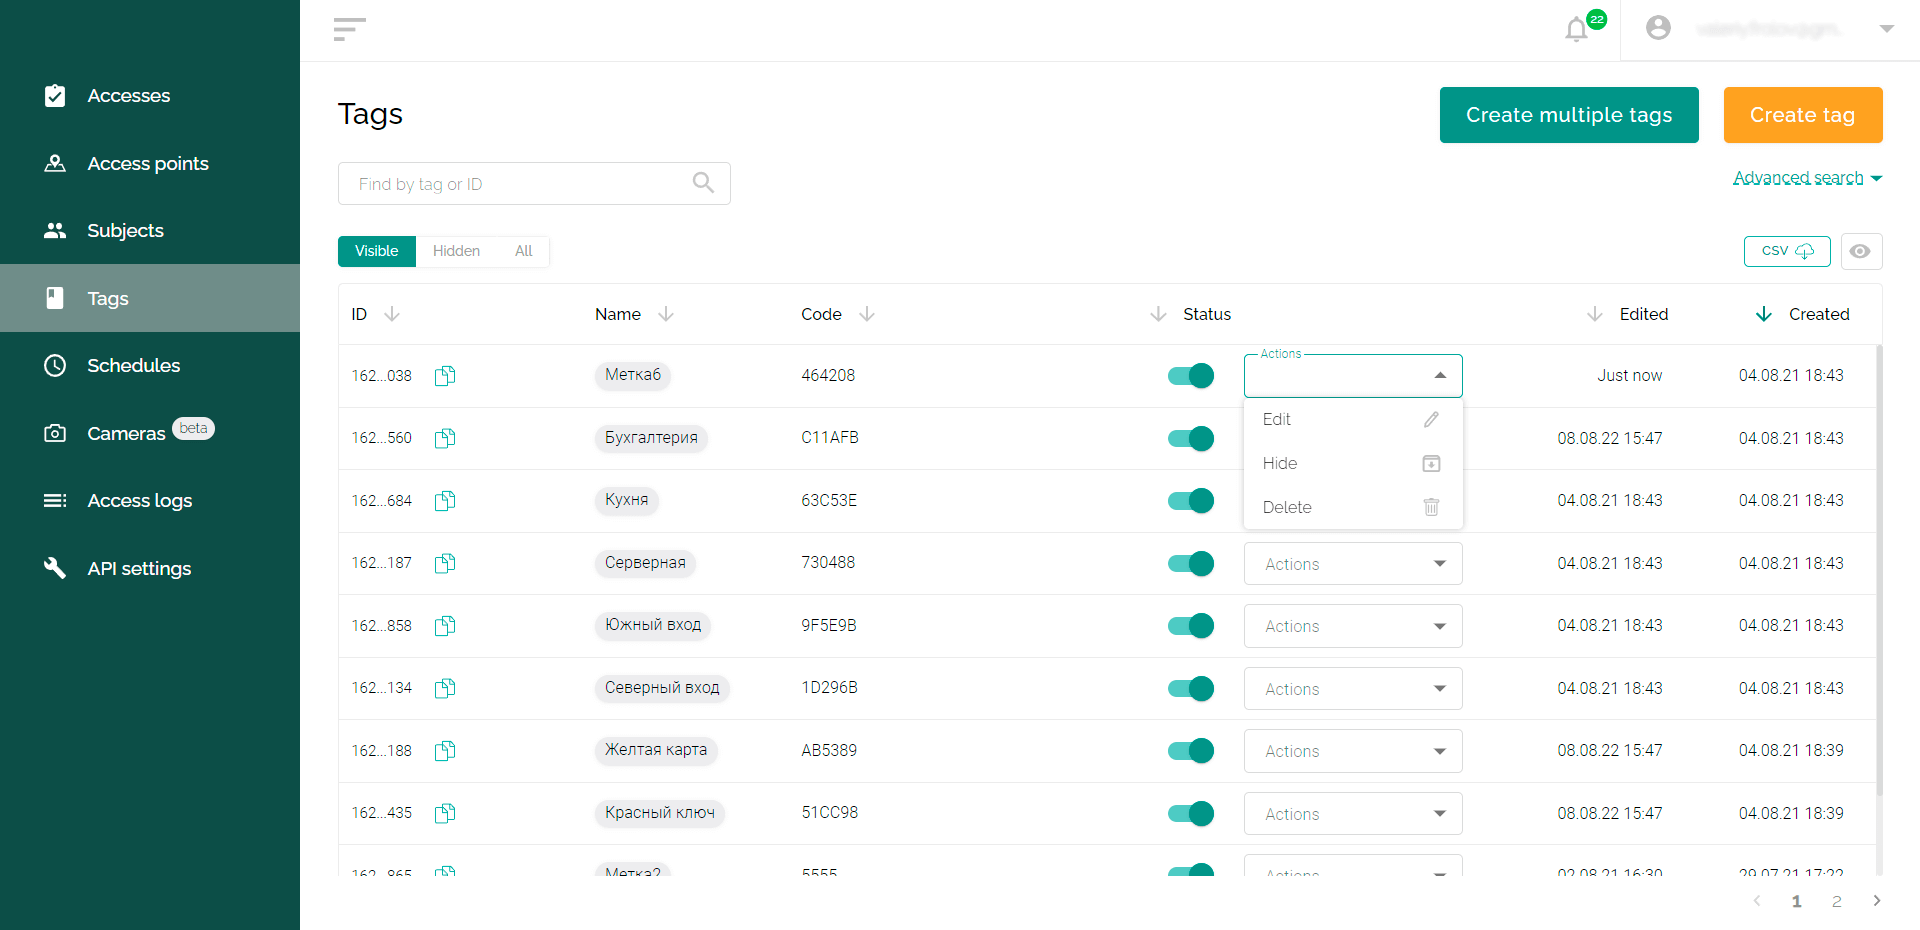
- Editing the tag name and code. To do this, on the “Tags” tab, click on the “Actions” drop-down list and select the “Edit” item. After making changes, click the "Update" button.
- Hide (archive) - after selecting the “Hide” item in the drop-down menu, your tag will be turned off and moved to the “Hidden” tab. It can be returned to “Visible” at any time. For this, you need to turn it on by clicking on the red switch in the “Status” column.
- Delete - when you select "Delete" in the drop-down list, the tag is removed from the list and the system, and all accesses by this tag become unavailable.